Coming to the next version of Chrome is a way to emulate “Dark Mode” using the DevTools. With the DevTools open and focused, hit SHIFT+CMD+P and choose “Emulate CSS prefers-color-scheme: dark” from the menu
You can also access the option via the Rendering panel.
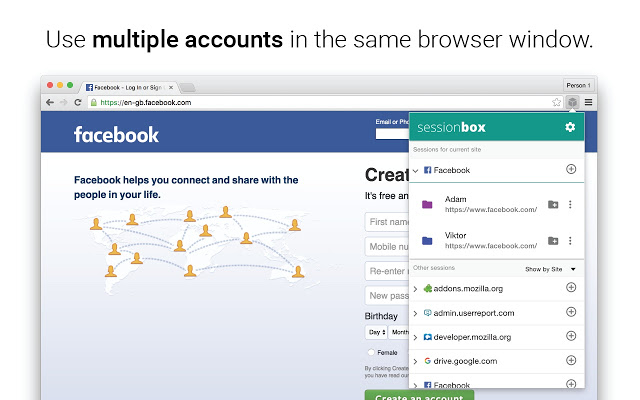
For some online services such as Twitter and Facebook I have more than one account. Be it accounts for my company, an alter ego, my children, etc.
To easily switch between these accounts – without logging out, back in, and doing the 2FA dance – I rely on a Chrome Extension named SessionBox which allows me to do just that.
Using websites with multiple accounts at the same time is made easy. Create an independent tab with a click of a button.
Use one browser with multiple active sessions per site. Log into multiple accounts on the same site simultaneously. No more need for secondary browsers, private sessions, let SessionBox handle these for you.
A new feature that landed in Chrome 73 is support for hardware Media Keys. Whenever you press one of the play/pause/next/prev buttons on your keyboard, Chrome can now respond to this and will pause/play the actively playing element.
Whilst this might be a good addition for many, it doesn’t work me, as I’m constantly playing music through iTunes. With iTunes jingling around, here’s my experience:
Open a site with a video and watch it play
Hit (keyboard) pause button to pause iTunes
Not iTunes but the video in the browser gets paused (😠)
CMD+TAB into iTunes
Hit (keyboard) pause button to pause iTunes
Video in the browser resumes playback (with iTunes still playing too) (😡)
Looks like the browser (or macOS?) isn’t properly releasing/giving the focus, redirecting all media keys’ keystrokes to Chrome (instead of the focussed iTunes).
~
Thankfully, one can disable the support for Hardware Media Keys through some flags.
Visit chrome://flags/#hardware-media-key-handling
Set the dropdown value to “Disabled”
Restart Chrome
Ah, much better now!
Did this help you out? Like what you see? Thank me with a coffee.
I don't do this for profit but a small one-time donation would surely put a smile on my face. Thanks!
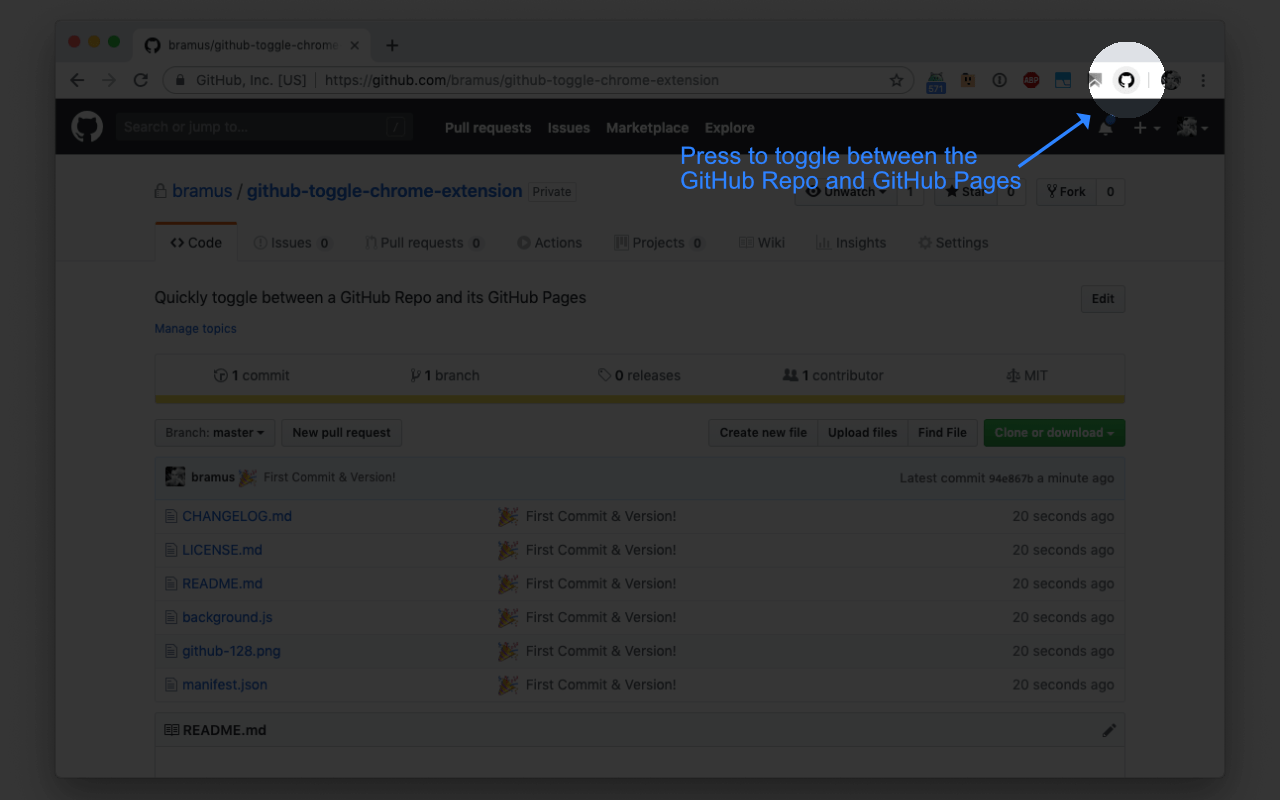
Last week Christian Heilmann (codepo8) released a handy bookmarklet that lets on switch between the GitHub Pages URL of a repo hosted on GitHub and the repo contents itself. This afternoon I took the liberty of transforming it into a Chrome Extension, mainly as an exercise to myself.
The extension adds a small button which becomes active whenever you are visiting a *.github.com or *.github.io domain. Upon clicking the button you toggle between the two URLs.
To create this plugin I started out with the core of Christian’s script and decorated the required Chrome Extension stuff around it. A few notes on the latter though:
Chrome provides a nice API which you can find at its Developer Guide. But before checking those, it might be worth to take a peek at some of the examples. I especially found the cld, pageaction_by_url, and merge_windows examples interesting.
With Developer Mode enabled, you can not only load your local in-development extension but also inspect it with the DevTools (and thus use console.log(), breakpoints, etc)
To publish your extension head over to the (new) Chrome Web Store Developer Dashboard. No need to pack it locally into a .crx file: you only have to create a .zip file and upload that zip.
New to DevTools in Chrome 64: the real-time Performance Monitor, easier filtering with the Console Sidebar, and automatic message groupings in the Console.
Keeping a feature of the Chrome Devtools – such as the FPS Meter – running with the DevTools closed unfortunately is not possible (yet?). Kayce Basques provides us with a little workaround though:
You can hack together a Puppeteer script that launches Chromium, opens a remote debugging client, then turns on the DevTools feature that you like (via the Chrome DevTools Protocol), without ever explicitly opening DevTools.
Oh yeah, the CSS Paint API will be enabled by default in Chrome 65:
CSS Paint API allows you to programmatically generate an image whenever a CSS property expects an image. Properties like background-image or border-image are usually used with url() to load an image file or with CSS built-in functions like linear-gradient(). Instead of using those, you can now use paint(myPainter) to reference a paint worklet.
Inside a paint worklet a CanvasRenderingContext2D has been made available for you to use. Use it like you would draw on a regular <canvas> element. Next to the CanvasRenderingContext2D you can also access the geometry of the element (e.g. get width and height), and can access other CSS properties (including CSS Variables).
There’s a nice demo included which showcases the rendering of a checkerboard pattern, which can be customised via two CSS Variables:
Here’s code for the painter demoed in the video above:
// checkerboard.js
class CheckerboardPainter {
// inputProperties returns a list of CSS properties that this paint function gets access to
static get inputProperties() { return ['--checkerboard-spacing', '--checkerboard-size']; }
paint(ctx, geom, properties) {
// Paint worklet uses CSS Typed OM to model the input values.
// As of now, they are mostly wrappers around strings,
// but will be augmented to hold more accessible data over time.
const size = parseInt(properties.get('--checkerboard-size').toString());
const spacing = parseInt(properties.get('--checkerboard-spacing').toString());
const colors = ['red', 'green', 'blue'];
for(let y = 0; y < geom.height/size; y++) {
for(let x = 0; x < geom.width/size; x++) {
ctx.fillStyle = colors[(x + y) % colors.length];
ctx.beginPath();
ctx.rect(x*(size + spacing), y*(size + spacing), size, size);
ctx.fill();
}
}
}
}
registerPaint('checkerboard', CheckerboardPainter);
Good introduction to using Puppeteer for your e2e tests:
One of the most popular tools for e2e testing is Selenium, which is a tool for automating web browsers. Selenium sounds cool in theory: write one set of tests that run on all browsers and devices, woohoo! Jk. In practice, Selenium tests are slow, brittle, and costly. So, on Ropig we are using Puppeteer – the official headless Chrome library.
[…]
We are using Jest as our test runner, but you can use any testing tools you want with Puppeteer.
The folks over at Spatie have just release Browsershot v3:
Browsershot is a PHP package which can convert a webpage to an image or pdf. The conversion is done behind the scenes by Puppeteer which controls a headless version of Google Chrome.
Conversion is easy-peasy, hence this example:
use Spatie\Browsershot\Browsershot;
// an image will be saved
Browsershot::url('https://example.com')
->save($pathToImage);
To save to a PDF give the target path a .pdf extension, or use the savePdf() method. Here’s an example with some more manipulations: