
If you’re not entirely familiar with CORS, this guide by Lydia Hallie will explain it to you using lots of visuals. CS Visualized: CORS →
A rather geeky/technical weblog, est. 2001, by Bramus
If you’re not entirely familiar with CORS, this guide by Lydia Hallie will explain it to you using lots of visuals. CS Visualized: CORS →

The opening presentation from An Event Apart Online Together: Front-End Focus held online in August 2020 It’s a typical Jeremy Keith talk with many things mentioned, all converging to what he described before in his blog post Robustness and least power (and also covered in other talks). Definitely worth your time. Hit the link for …

This message by Elaina Natario writing over at Thoughtbot cannot be repeated enough: While both the alt attribute and the figcaption element provide a way to describe images, the way we write for them is different. alt descriptions should be functional; figcaption descriptions should be editorial or illustrative. Examples of both functional and editorial descriptions …

I like this demo. Very pleasing on the eyes. To easily create WebGL demos the author created a little library called RGBA.js which is used under the hood. Focusing on hiding WebGL/JavaScript code from you and giving ability to write fragment shader code only Once included, this is the only code one has to write: …

Heydon is back with a new project named “Webbed Briefs”: WEBBED BRIEFS are brief videos about the web, its technologies, and how to make the most of them. They’re packed with information, fun times™, and actual goats. Yes, it’s a vlog, but it isn’t on Youtube. Unthinkable! The first video is entitled “What Is ARIA …

New in Chromium 85 is support for the AV1 Image File Format (AVIF), which is pretty impressive: AVIF offers significant file size reduction for images compared with JPEG or WebP; ~50% savings compared to JPEG, and ~20% savings compared to WebP. 🦊 Using Firefox and can’t wait to use AVIF images? Set the image.avif.enabled flag …
Continue reading “How to embed AV1 Image File Format (AVIF) images”
role="doc-subtitle"
Over at CSS-Tricks, Chris takes a look at how to mark up a “Double Heading”, a common pattern where you have a big heading with a little one preceding/succeeding it (as pictured above). After going over a few options, the answer comes from a tweet by Steve Faulkner: use role="doc-subtitle" for the secondary heading. As …
Continue reading “Semantically Identify a Heading Subtitle with ARIA role="doc-subtitle"“

The MediaPipe and Tensorflow.js teams have released facemesh and handpose: The facemesh package infers approximate 3D facial surface geometry from an image or video stream, requiring only a single camera input without the need for a depth sensor. This geometry locates features such as the eyes, nose, and lips within the face, including details such …
Continue reading “Realtime Face and Hand Tracking in the browser with TensorFlow”
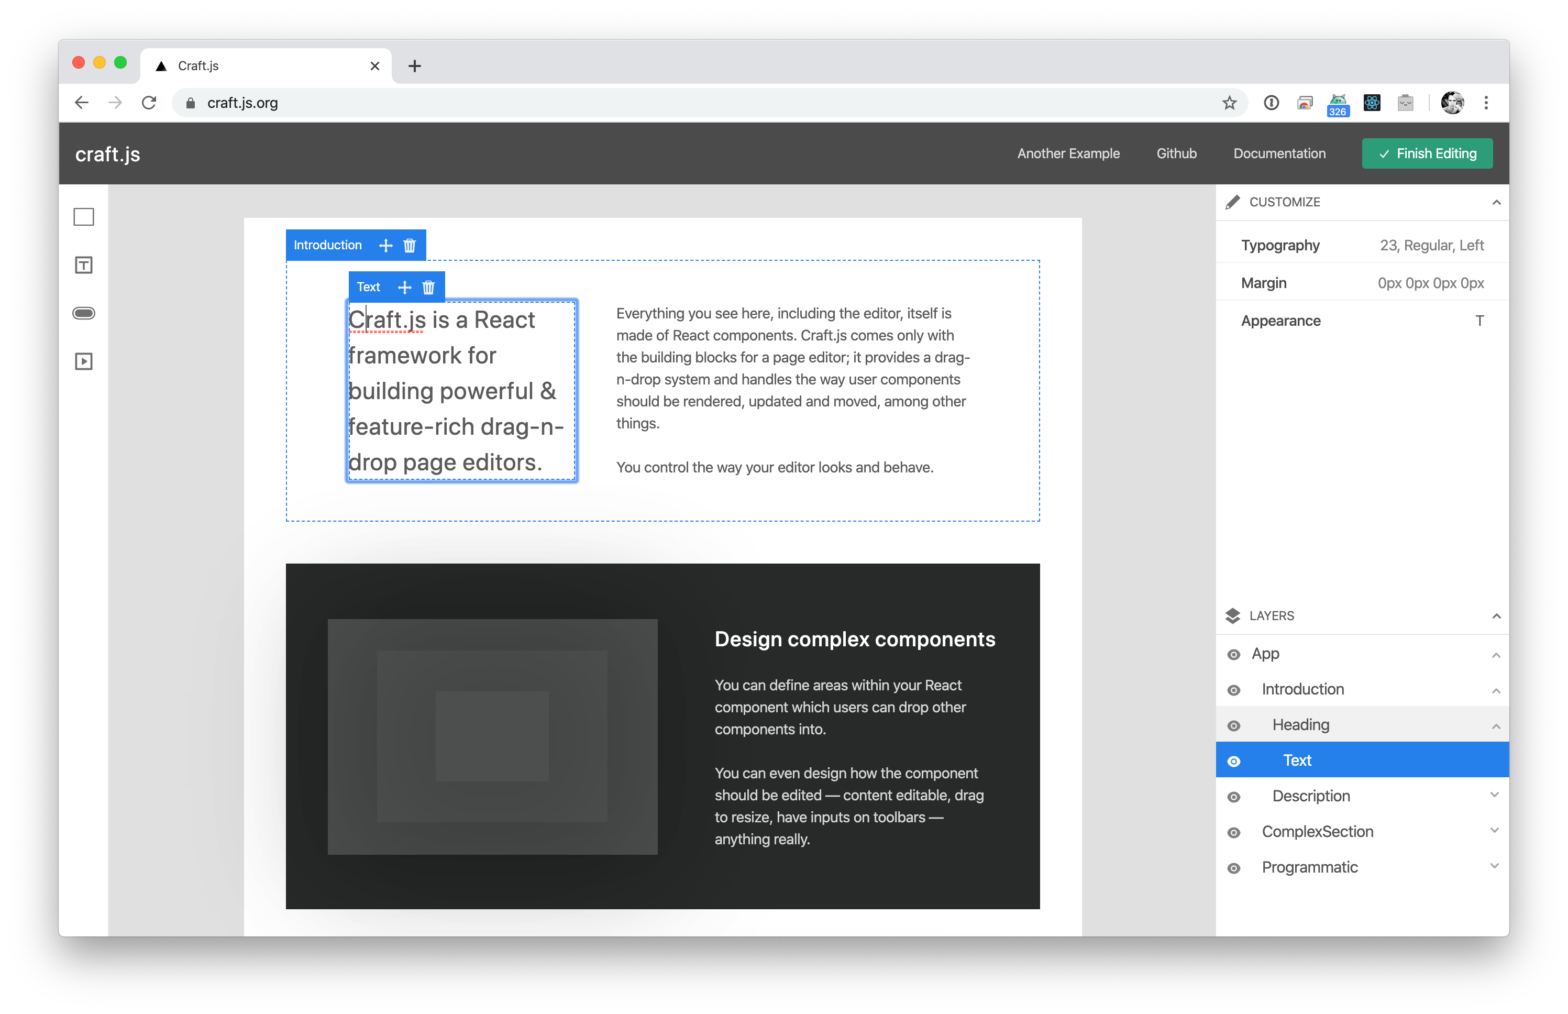
Page editors are a great way to provide an excellent user experience. However, to build one is often a pretty dreadful task. Craft.js solves this problem by modularising the building blocks of a page editor. It provides a drag-n-drop system and handles the way user components should be rendered, updated and moved – among other …
Continue reading “Craft.js – A React framework for building drag-n-drop page editors.”

Harry Roberts on how to set a Performance Budgets if you really don’t have a clue where to start: Time and again I hear clients discussing their performance budgets in terms of goals: “We’re aiming toward a budget of 250KB uncompressed JavaScript; we hope to be interactive in 2.75s”. While it’s absolutely vital that these …
Continue reading “Performance Budgets for those who don’t know where to start”