Have you heard about #CSS @scope? It’s an upcoming way to scope the reach of your CSS selectors, allowing you to move away from methodologies such as BEM because you no longer need to name those in-between elements.
It’s coming to Chrome 118, so let’s take a closer look …
~
UPDATE 2023.10.04 I’ve published a more in-depth article covering @scope over at developer.chrome.com. You should check that one out instead of this quick intro.
~
Let’s start with an example showing why you’d need @scope.
Say you have the markup as seen in the demo over at https://codepen.io/bramus/pen/dyKjbox.
HTML:
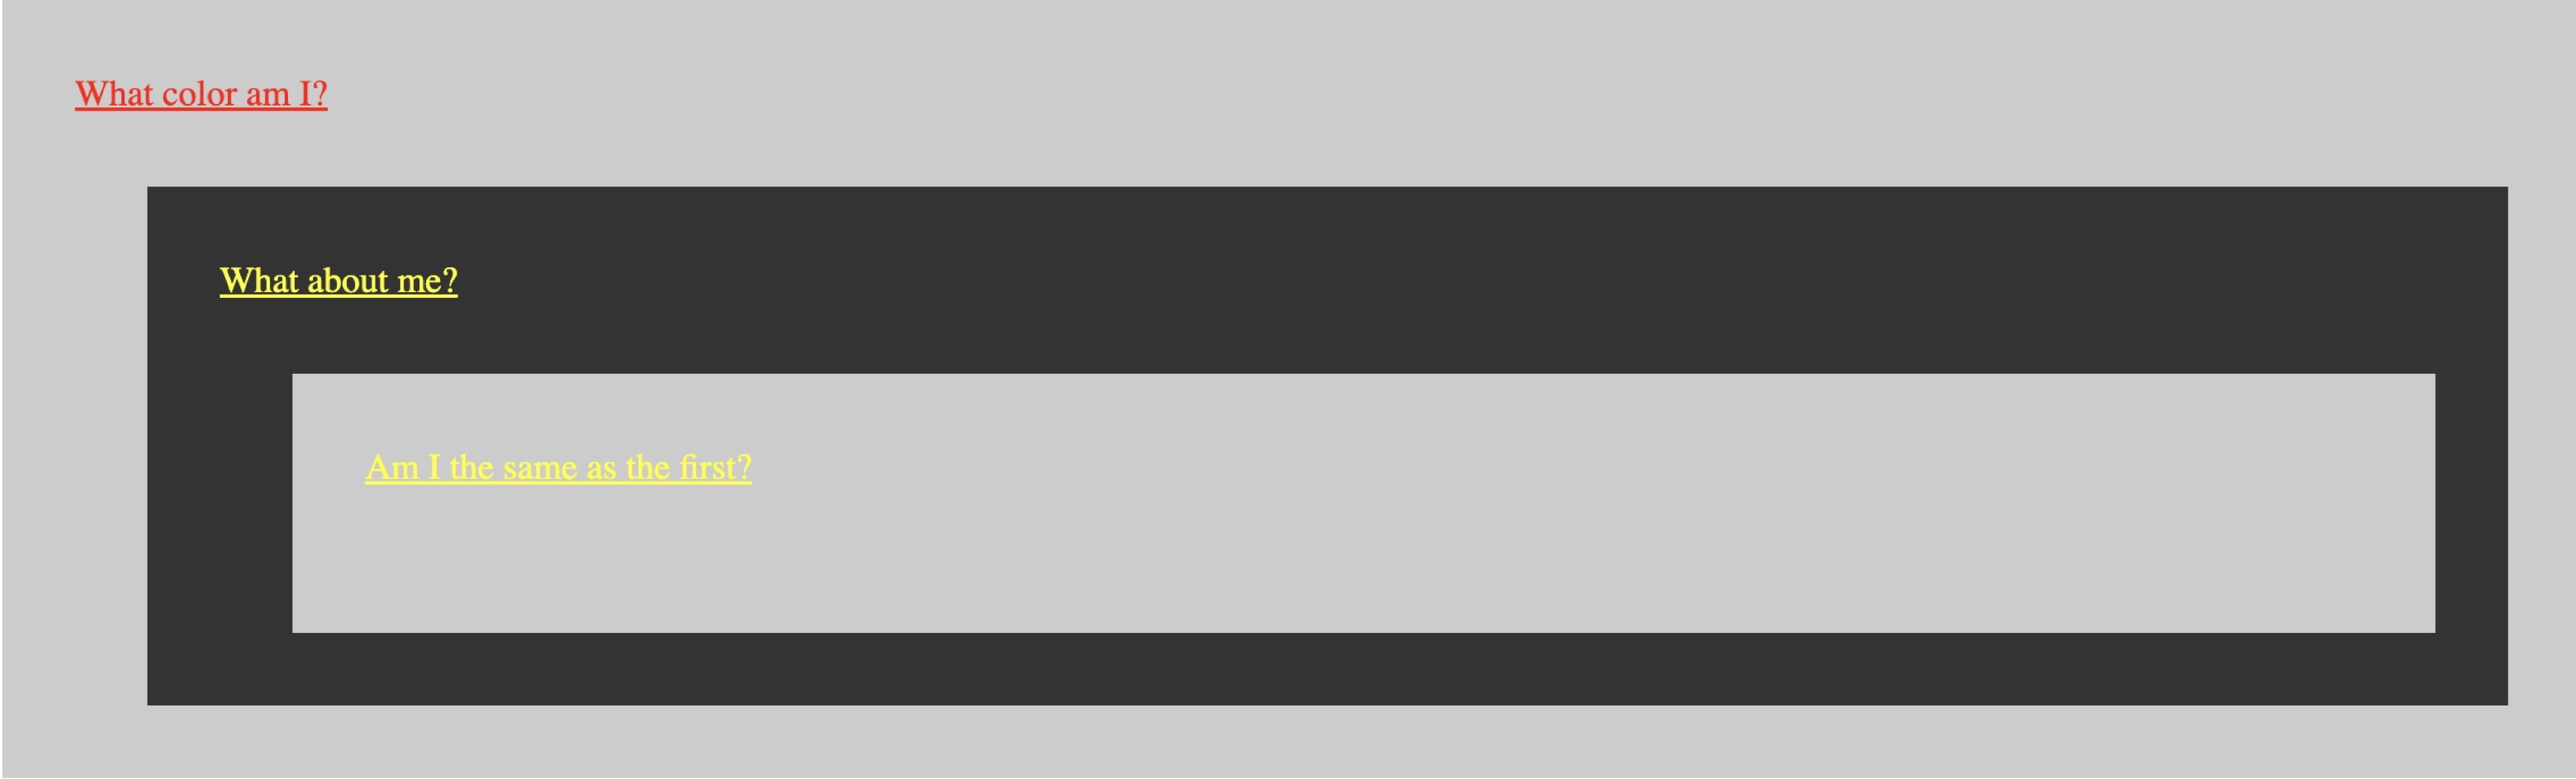
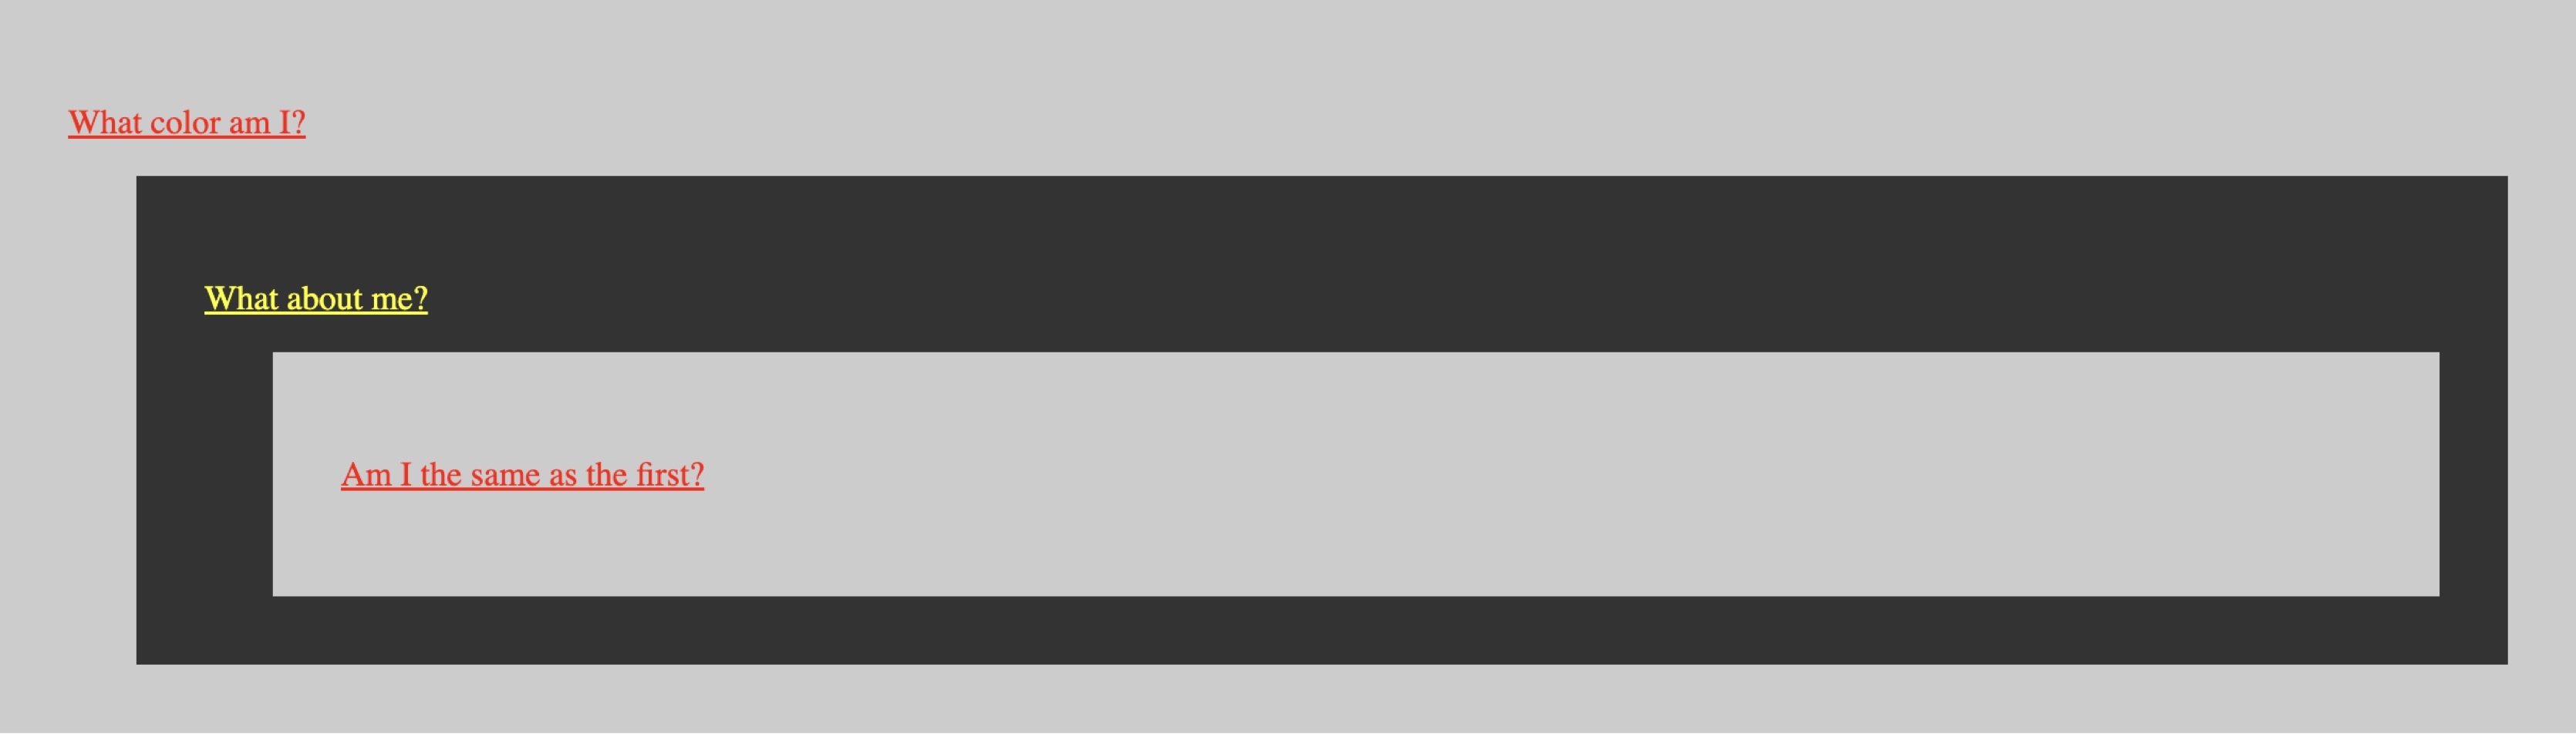
<div class="light">
    <p><a href="…">What color am I?</a></p>
    <div class="dark">
        <p><a href="…">What about me?</a></p>
       <div class="light">
            <p><a href="…">Am I the same as the first?</p>
        </div>
    </div>
</div>
CSS:
.light { background: #ccc; }
.dark  { background: #333; }
.light a { color: red; }
.dark a { color: yellow; }
~
In the browser, that third link will be yellow, not red …
~
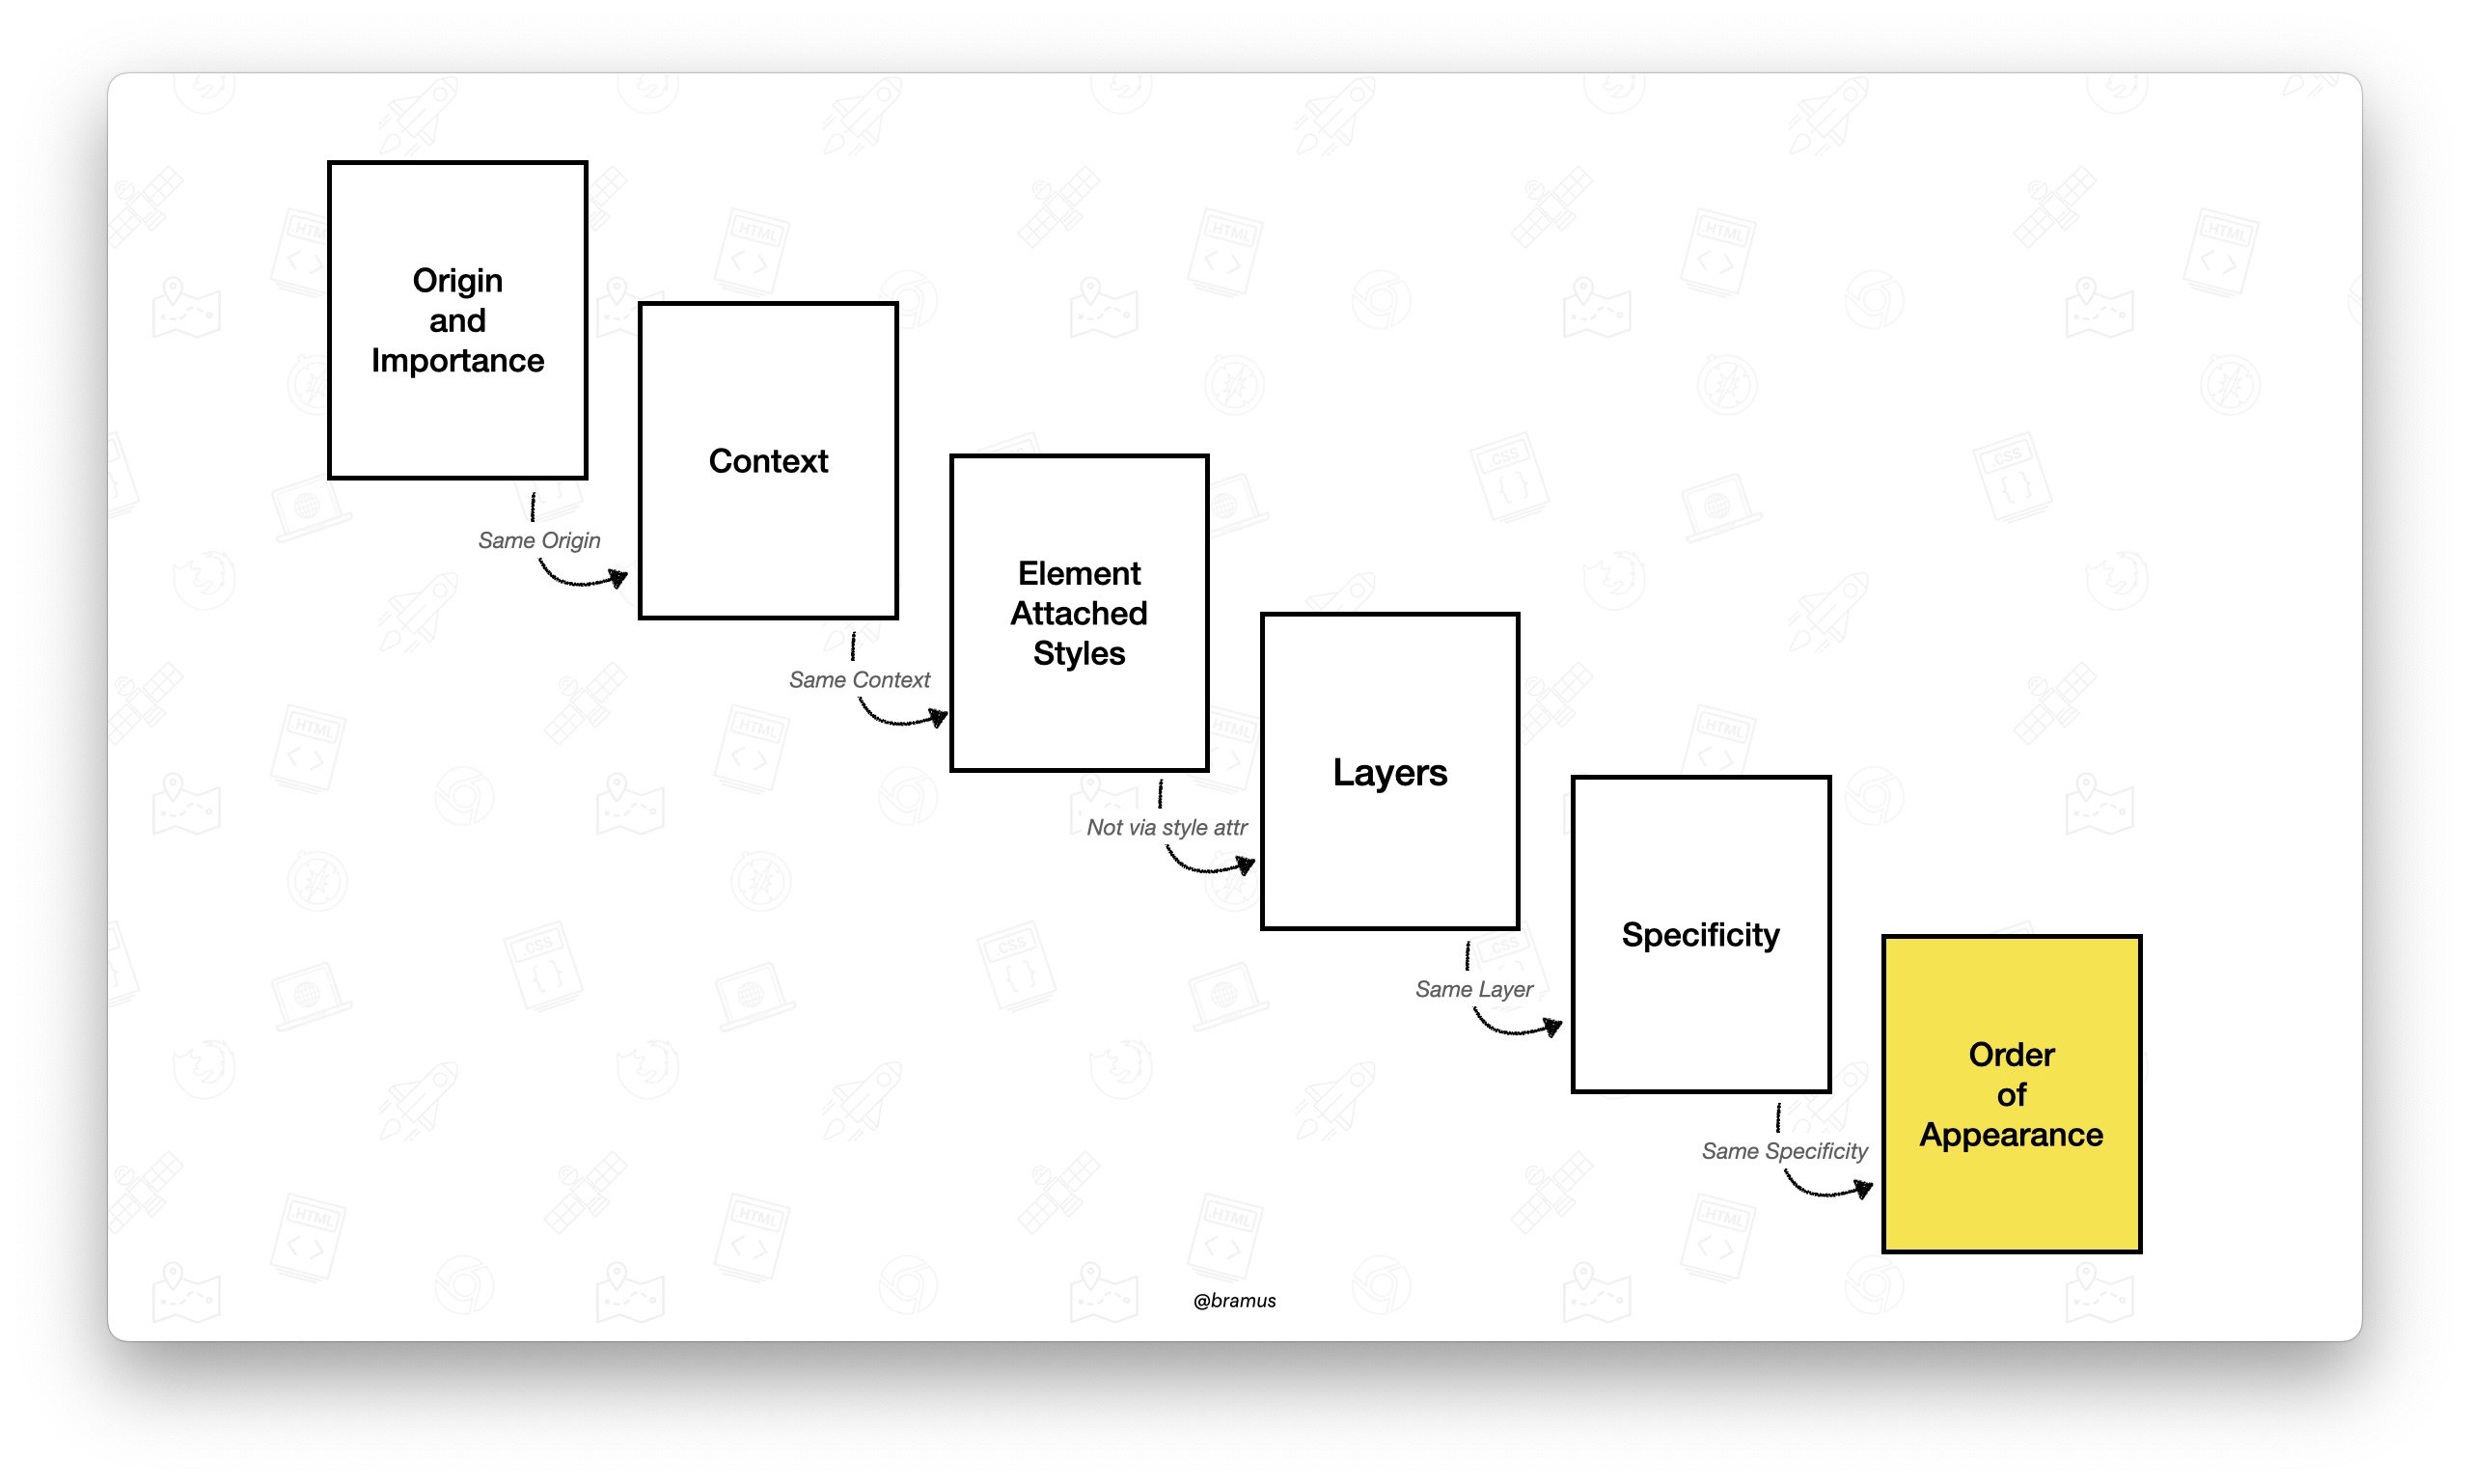
This because of how the CSS cascade works.
The used selectors have the same specificity, so the cascade moves on to “Order of appearance”.
Because of that, .dark a gets applied last. And since colors inherit, the link inside that nested .light will also be yellow.
~
This is where @scope can fix things. You use it to scope style rules in CSS, with the application of weak scoping proximity between the scoping root and the subject of each style rule.
(The scoping root is the part between the parens of @scope – here .light or .dark)
@scope (.light) {
    :scope { background: white; }
    a { color: blue;}
}

@scope (.dark) {
    :scope { background: black; }
    a { color: #ccf; }
}
~
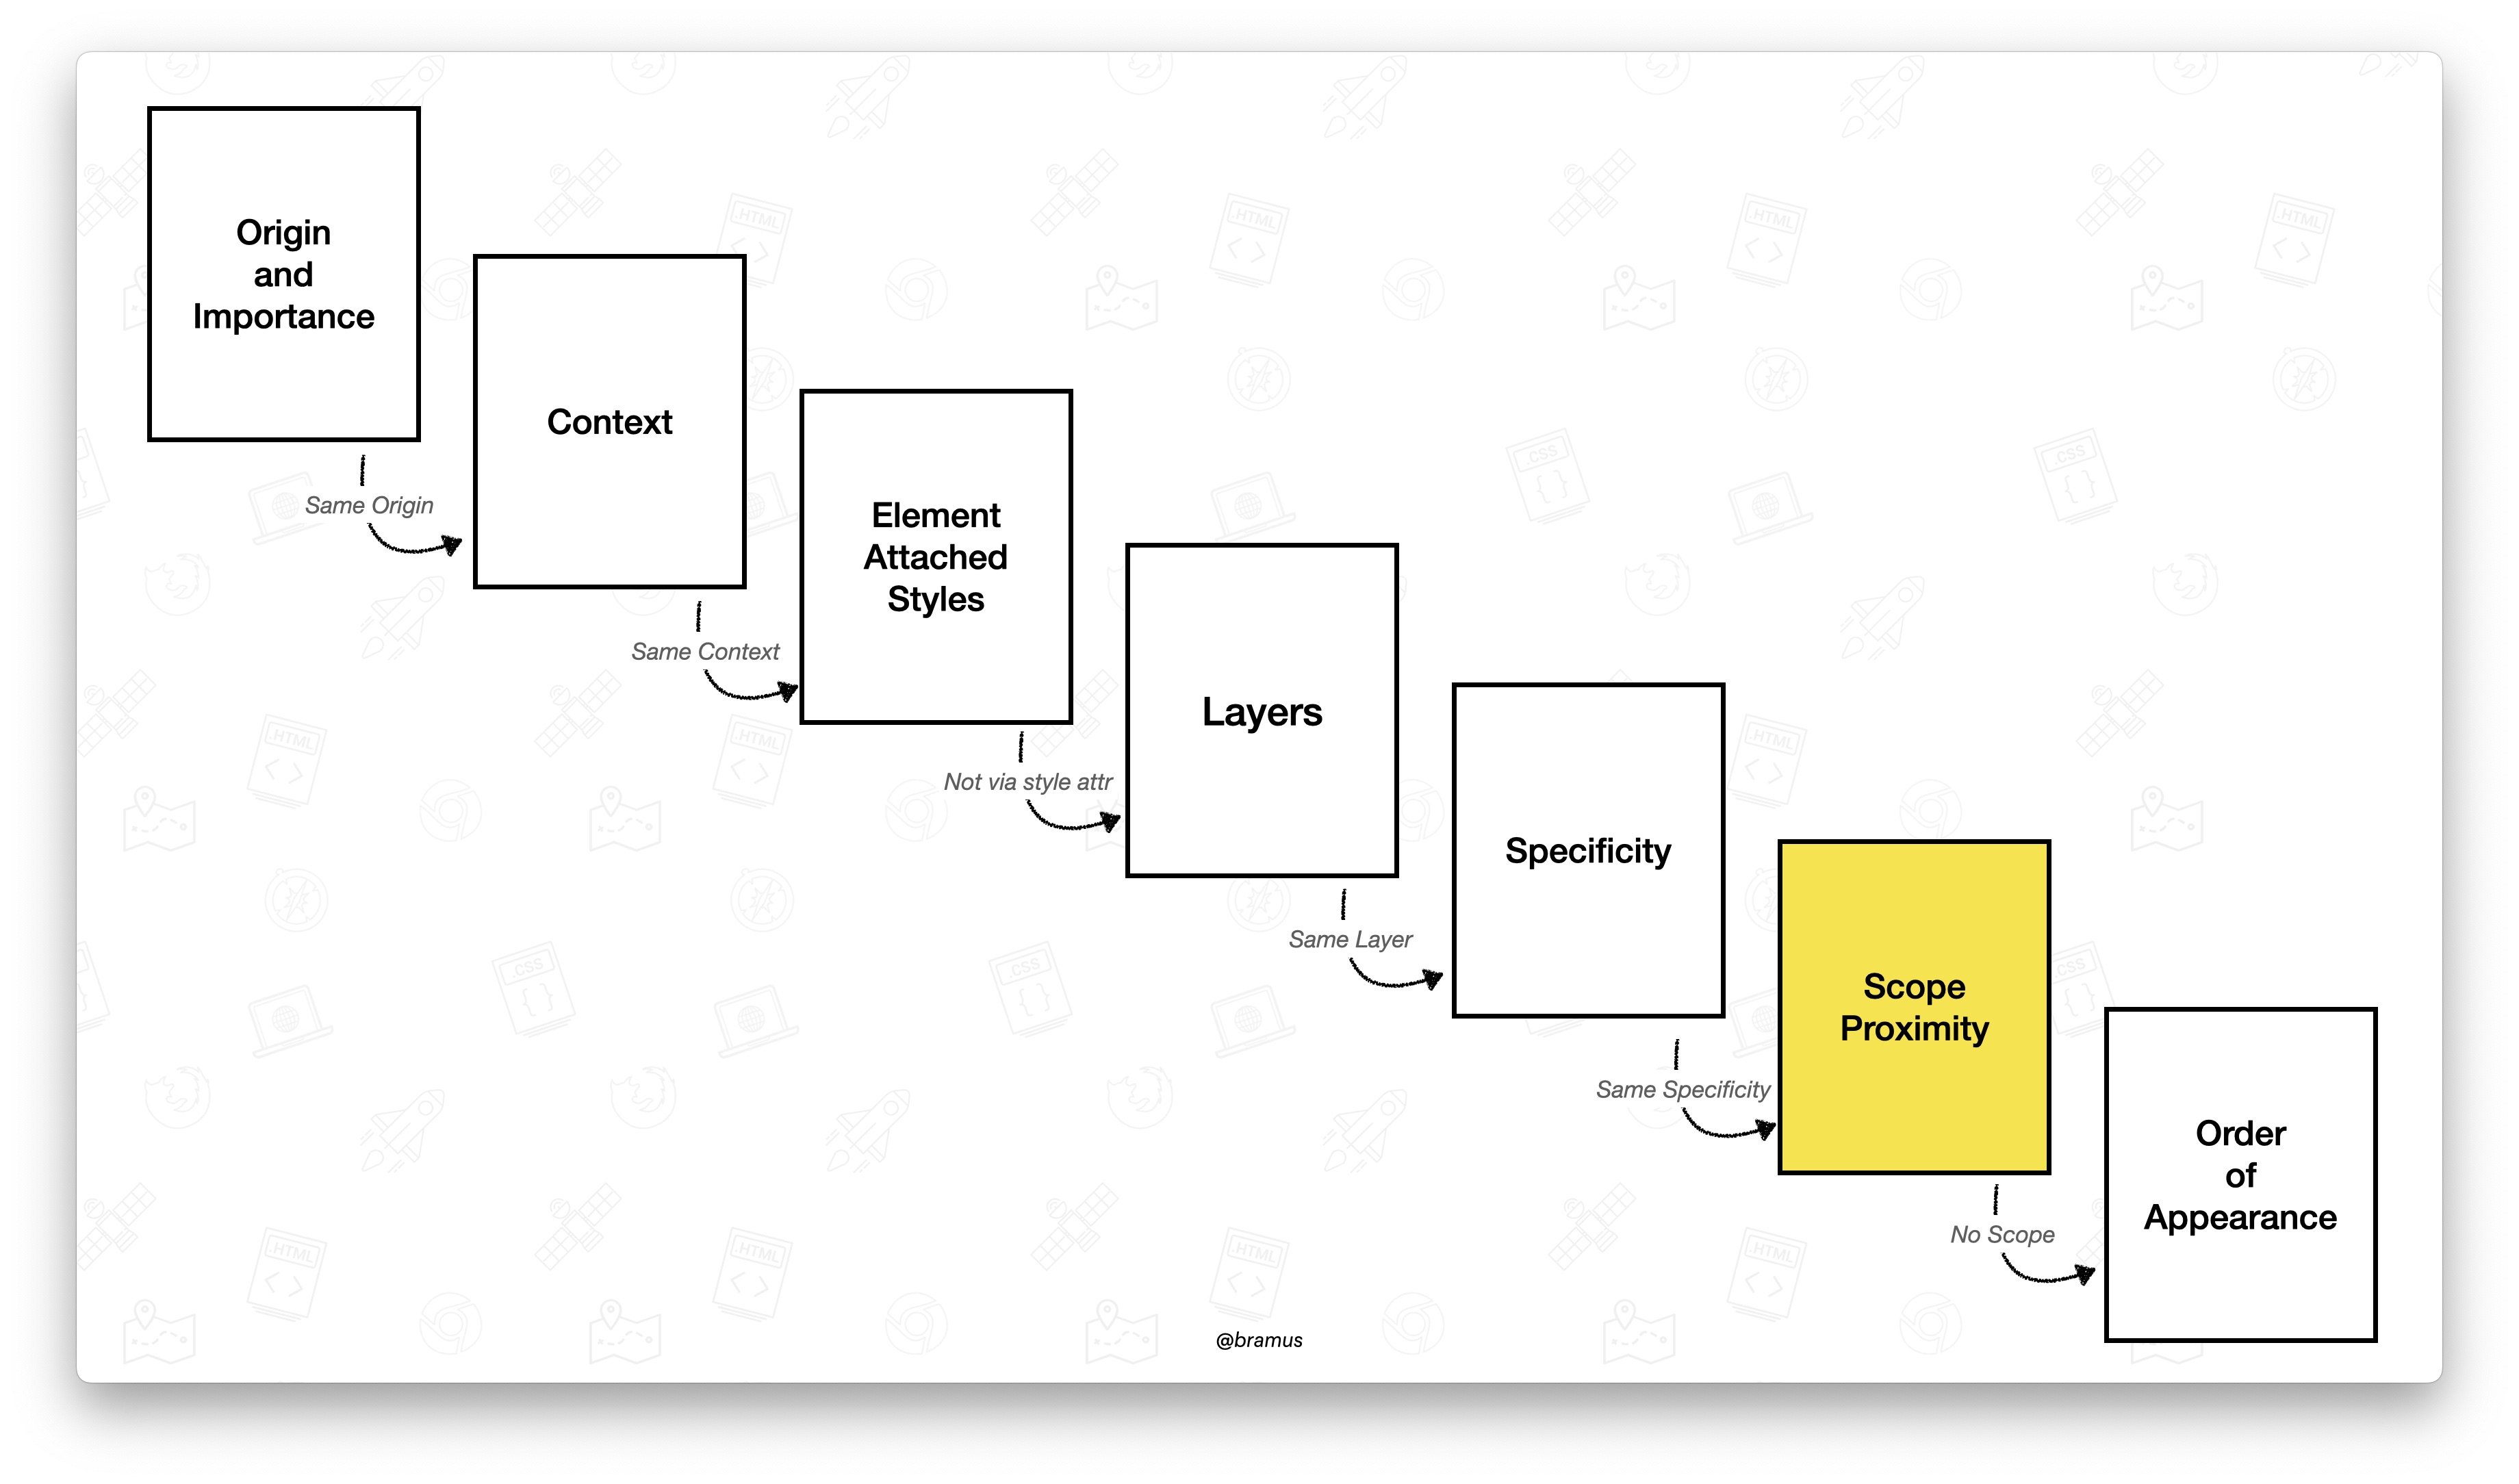
The reason that this works is because scoping is an extra step in the cascade. Declarations of the same specificity are weighted by proximity to their scoping root before falling back to source order. How cool is that?! 🤩
~
So in our example, the visual output will now be correct: links inside .light will red and links inside .dark will be yellow. This because they look up the nearest scope root, yay!
~
The cool thing about @scope is that you can also set a scope end, to create a “donut scope”.
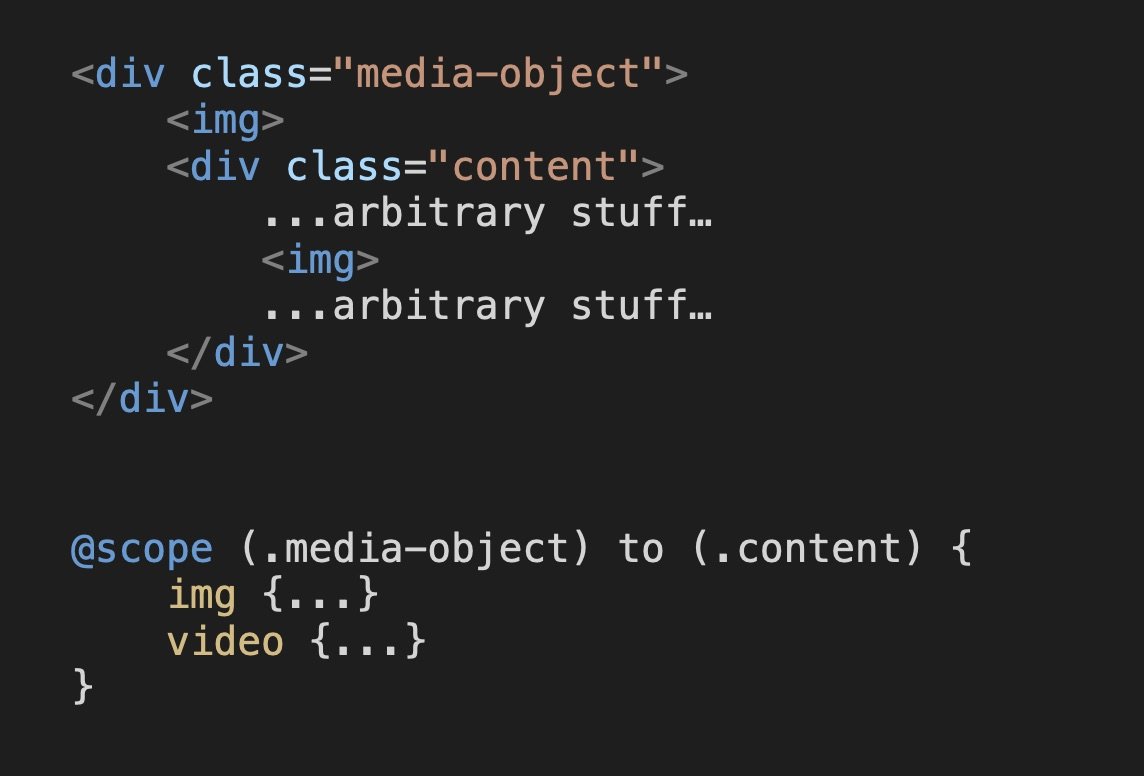
@scope (.media-object) to (.content) {
    img {...}
    video {...}
}
The selectors inside @scope block only target the elements between the start and end of the scope.
So when combined with the markup below, the CSS won’t target the img inside .content
<div class="media-object">
    <img>
    <div class="content">
        ...arbitrary stuff…
        <img>
        ...arbitrary stuff…
    </div>
</div>
~
This allows you to move away from methodologies such as BEM, where you would have named the image in the header something like .media-object__header__image, or complex selectors that rely on a bunch of combinators.
With @scope you no longer need to, you simply cut off the reach of the selectors using the scope end 😊
~
One important note to make is that @scope limits the reach of the selectors, it does not stop/prevent inheritance.
For example, a color declaration inside a donut-scope will still inherit onto children deeper down the tree that located outside of the scope end.
~
CSS Scope is shipping with Chrome 118, which gets a stable release this October. You can already try it out in Chrome Canary today.
WebKit/Safari have expressed their support for this API, but Mozilla/Firefox is not convinced about it yet …
~
This post originally was a thread on Twitter and on Mastodon. Feel free to repost those threads to give them more reach.
~
Not covered in this post are the meaning of :scope (+ how it differs from &) and a prelude-less @scope. More on that in a future post. 😉
~
🔥 Like what you see? Want to stay in the loop? Here's how:
I can also be found on 𝕏 Twitter and 🐘 Mastodon but only post there sporadically.
This sounds like it would be useful for nesting situations as you’ve demonstrated. I have a lot of styles that exist purely to reset or kill inherited styles from parents of unrelated components. This seems like a nice half-way point between light DOM and shadow DOM for those of us who work in a controlled environment and don’t want to take on all the baggage that come with shadow DOM (but would still like some of the encapsulation).
Couldn’t you just use
.dark > a
.light > a
.media-object > img
.content > img
?
Yes, but then your DOM can’t change. With
@scopeyou have the freedom to move elements around in the tree, without needing to adjust your CSS.That said, if that’s no issue to you then you don’t need
@scope