~
Way back in 2005, I used a Flash PageFlip component to display a book on a website. Ever since, recreating a modern version has been on my backlog to investigate. With the arrival of the experimental HTML-in-Canvas API, we can finally bring it back — this time displaying real HTML.
~
⚠️👨🔬 Experimental Feature!
The technology used to power this <hic-pageflip> component is still experimental and is undergoing significant changes. To see the component in action, you need Chrome with chrome://flags#canvas-draw-element enabled.
~
PageFlip?
PageFlip is a classic UI pattern that simulates a hyper-realistic, interactive book or magazine: users can click, drag, and peel page corners to flip through content with dynamic lighting, curls, and shadows. It was popularized in 2005–2006 by Iparigrafika who shipped a Flash Component.
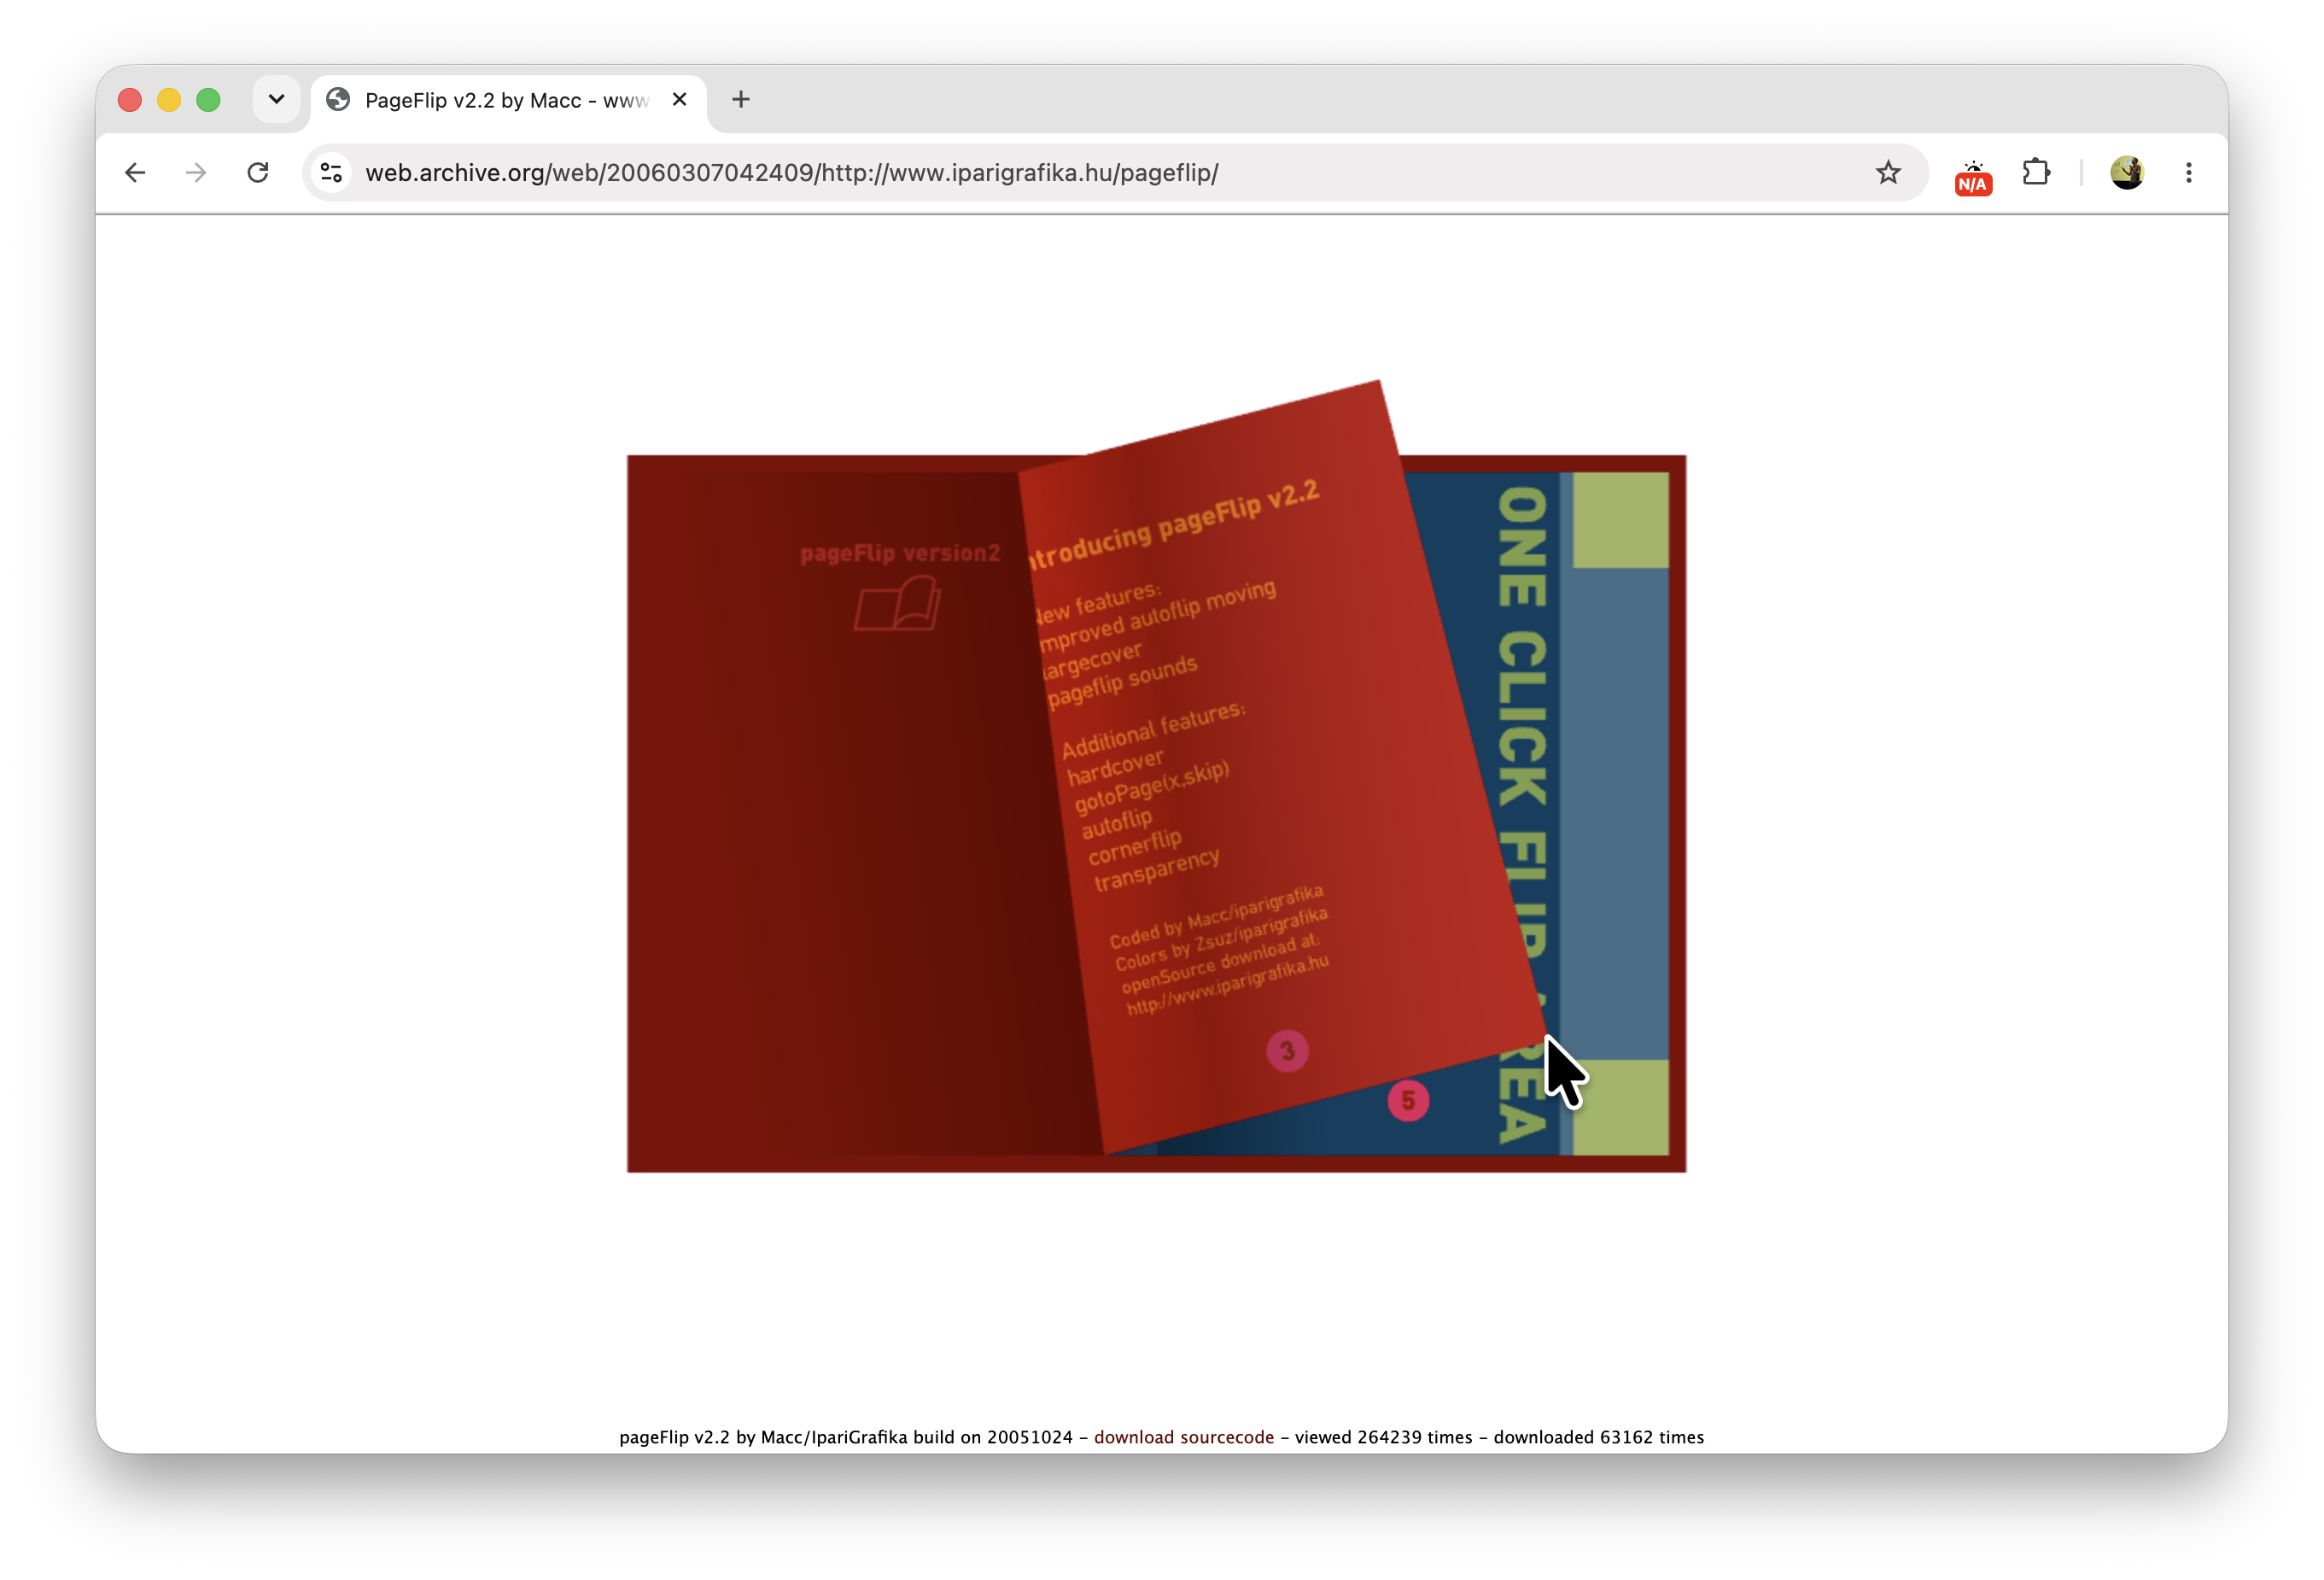
While recreating this effect on the web has technically been possible for years using 2D Canvas or WebGL shaders, it always came with massive accessibility and usability drawbacks. Because the pages were trapped inside a canvas pixel grid or rendered as static images, you lost selectable text, clickable links, screen reader support, and browser features like find-in-page.
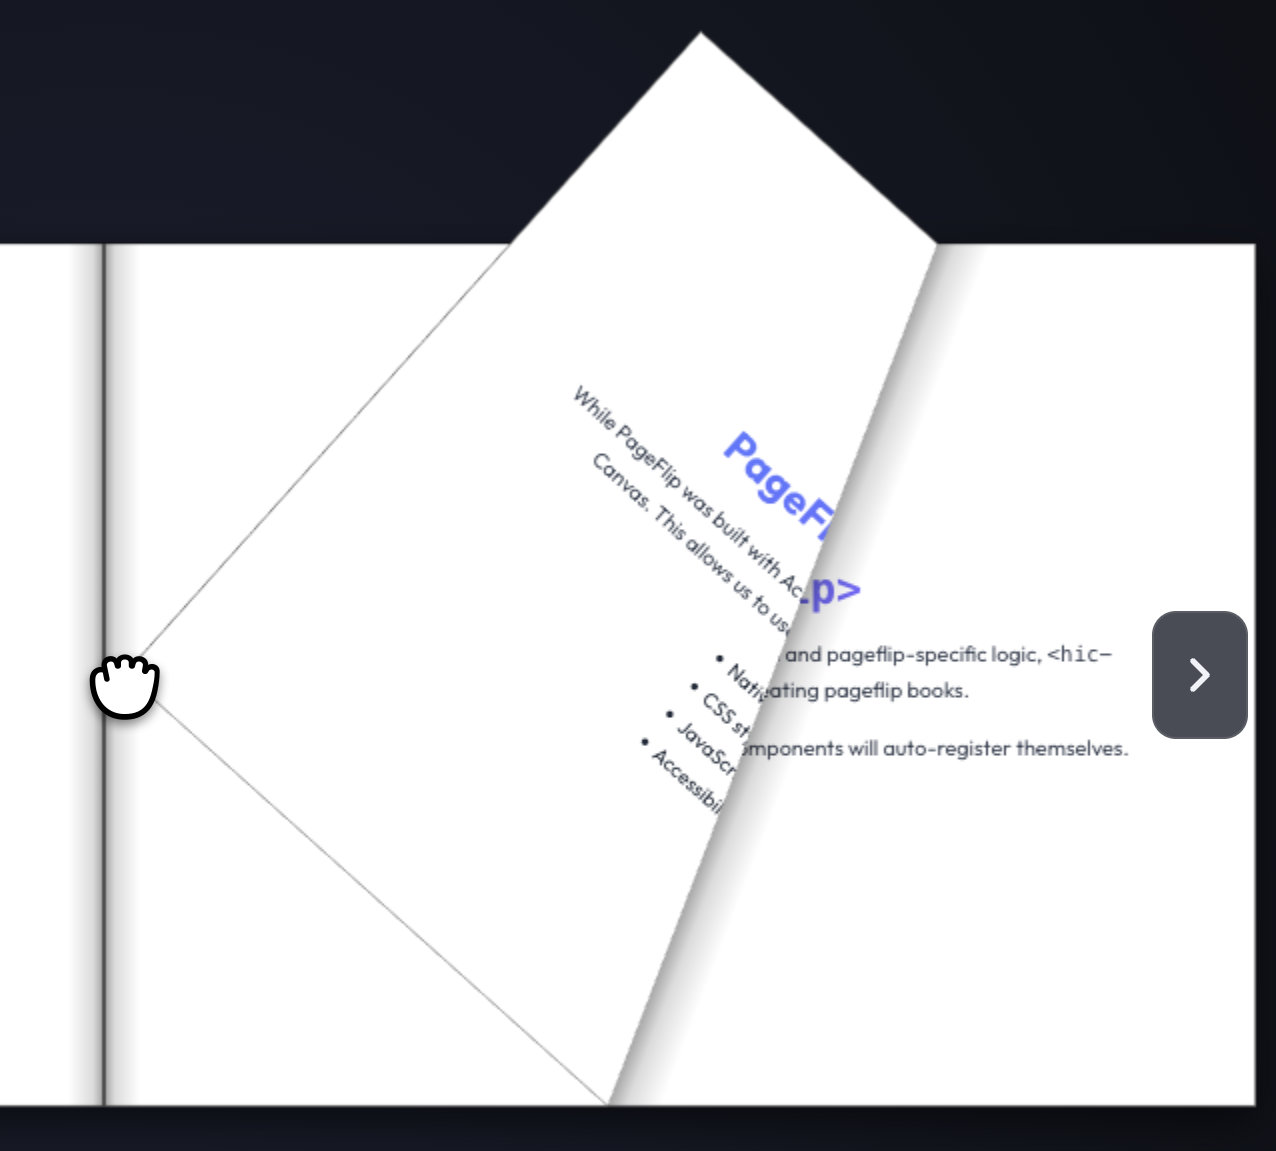
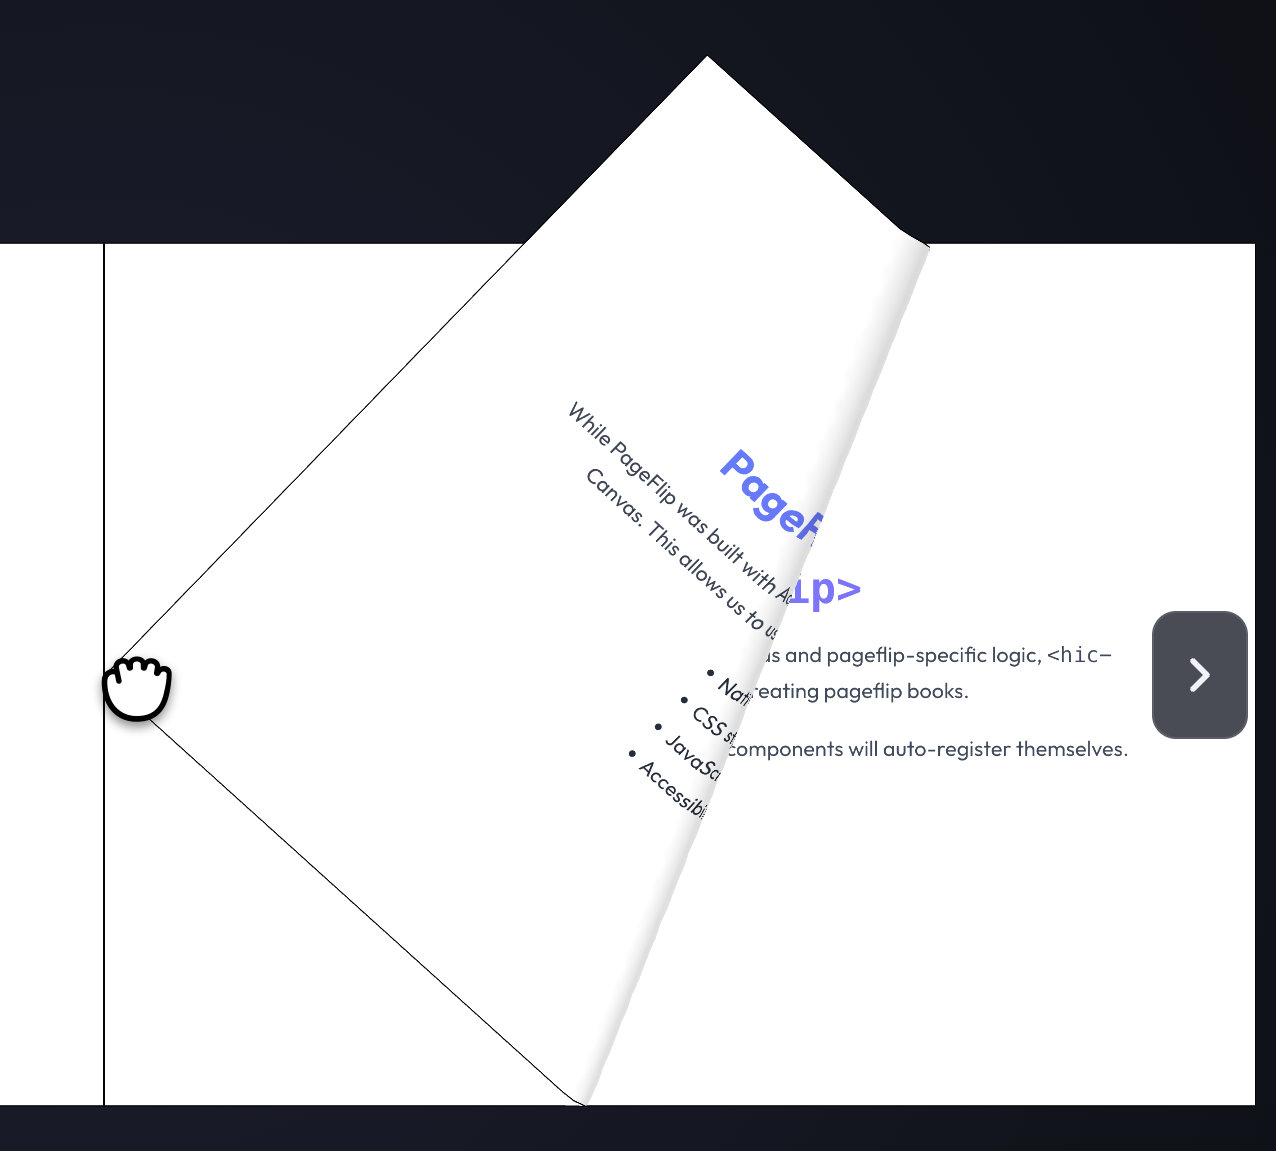
Using HTML to render pages has also been possible by leveraging CSS transforms (see this example). However, that effect was always somewhat “fake”: it’s a pure 2D clip effect with a shadow laid on top, instead of true 3D folding and curling as described in Chris Luke’s “The anatomy of a page curl”.
~
HTML-in-Canvas was made for this
Up until now, you always had to compromise: either get authentic 3D page curls with Canvas or WebGL at the cost of throwing away accessibility, or stick to real HTML with CSS transforms and settle for a flat 2D clipping illusion.
The new (and still experimental) HTML-in-Canvas API changes the game. By letting you draw live DOM elements directly into canvas contexts and WebGL textures, you no longer have to choose. You can build true 3D conical and cylindrical page curls, while the pages remain fully interactive and accessible, with selectable text and clickable links.
Armed with Google Antigravity and the math from Chris Luke’s article, I set out to build it.
~
Keeping Things Easy: <hic-pageflip>
In under two hours, I had a working pageflip prototype powered by HTML-in-Canvas up and running. I then continued the work to further refine the interactions and visuals, and eventually had Antigravity refactor the whole thing into an easy-to-use web component: <hic-pageflip>
You can see it in action on the demo website which is also embedded here:
The source code is available on GitHub and you can install the package from NPM.
~
Installation
You can install the package from npm:
npm install hic-pageflipImport the package in your application to have it register the custom elements:
import 'hic-pageflip';You can also load it directly from a CDN and use it in your HTML, without npm at all. For example, using jsDelivr:
<script type="module" src="https://cdn.jsdelivr.net/npm/hic-pageflip"></script>Once installed and imported, you can start using it.
~
Minimal Example
With the component, creating a pageflip interface powered by HTML-in-Canvas becomes as easy as this:
<hic-pageflip engine="3d" page-width="300" page-height="450" page-background="#c1c8c7">
	<!-- Slide 1: Cover -->
	<hic-pageflip-page>
		<div class="content">
			<h1>Cover Page</h1>
			<p>This is HTML inside a 3D WebGL pageflip!</p>
		</div>
	</hic-pageflip-page>

	<!-- Slide 2 -->
	<hic-pageflip-page>
		<div class="content">
			<h2>Inside Left Page</h2>
			<p>Selectable text and clickable <a href="https://github.com/bramus/hic-pageflip" target="_top">links</a> work natively.</p>
		</div>
	</hic-pageflip-page>

	<!-- Slide 3 -->
	<hic-pageflip-page>
		<div class="content">
			<h2>Inside Right Page</h2>
			<p>And images (with the right CORS headers)!</p>
			<p><img src="https://gravatar.com/avatar/c47bf5e271115acb3820392b0a5c9574" alt="Bramus" height="50" width="50" crossorigin="anonymous"></p>
		</div>
	</hic-pageflip-page>

	<!-- Slide 4: Backcover -->
	<hic-pageflip-page>
		<div class="content">
			<h2>Backcover</h2>
			<p>And CSS as well …</p>
			<p class="rainbow">Rainbow text, Yay!</p>
		</div>
	</hic-pageflip-page>
</hic-pageflip>
The enclosing <hic-pageflip> component creates the pageflip interface, and the <hic-pageflip-page> components are the pages contained within.
With some mininal styling applied, the code above looks like this:
~
Customization
Use the attributes on the <hic-pageflip> component to control a bunch of things, including which engine to use:
- 2D Engine (
engine="2d"): Uses 2D canvas affine matrix reflections, clipping, and dynamic drop shadows. - 3D Engine (
engine="3d"): Uses WebGL vertex shaders for true cylindrical and conical page curls, based on Chris Luke’s page curl algorithm.
The default is 3d, the one with the true page curl effect.
The <hic-pageflip> component itself only offers the pageflip interface, without any controls. However, you can control the pageflip programmatically by calling methods directly on the component:
const pageflip = document.querySelector('hic-pageflip');
// Go to next page
pageflip.next();
// Go to previous page
pageflip.previous();
// Go to page 4
pageflip.goToPage(4);
// Flip to a page
pageflip.flipTo(4);
Hook these up to your own buttons and you’re good to go 🙂
~
Links and resources
To recap, here are all the links you need:
- 🚀 Project Homepage + Demo: https://hic-pageflip.netlify.app/ →
- 🤖 Minimal Demo:
<hic-pageflip>demo (CodePen) → - 💻 Source Code:
bramus/hic-pageflip→ - 📦 NPM Package:
hic-pageflip→
~
Spread the word
Feel free to reshare one of the following posts on social media to help spread the word:
~
🔥 Like what you see? Want to stay in the loop? Here's how:
I can also be found on 𝕏 Twitter and 🐘 Mastodon but only post there sporadically.
