
💡 Sparked by the 3D Ken Burns Effect from a Single Image post, I was reminded of a few other 3D photo things …
About a year ago, Facebook announced a feature named “3D Photos”, a way to show photos taken with Apple’s “Portrait Mode” (or any other device that does the same) interactively:
Whether it’s a shot of your pet, your friends, or a beautiful spot from your latest vacation, you just take a photo in Portrait mode using your compatible dual-lens smartphone, then share as a 3D photo on Facebook where you can scroll, pan and tilt to see the photo in realistic 3D—like you’re looking through a window.
As unearthed by this research Facebook builds a 3D model out of the image + depth data, and then render the generated .glb file on screen using Three.js.
For example, here’s the wireframe of the kangaroo pictured at the top of this post:
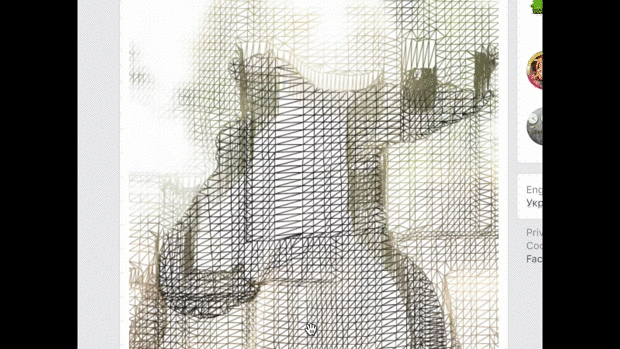
3D wireframe of the kangaroo (Yuri akella Artiukh)
~
A photo taken in Apple’s Portrait Mode is in essence no more than the flat photo combined with a depth map. A depth map is a gray scale photowhere white defines points close-by and pure black defines points farthest away. Using the depth map, you can then blur the content that is furthest away.
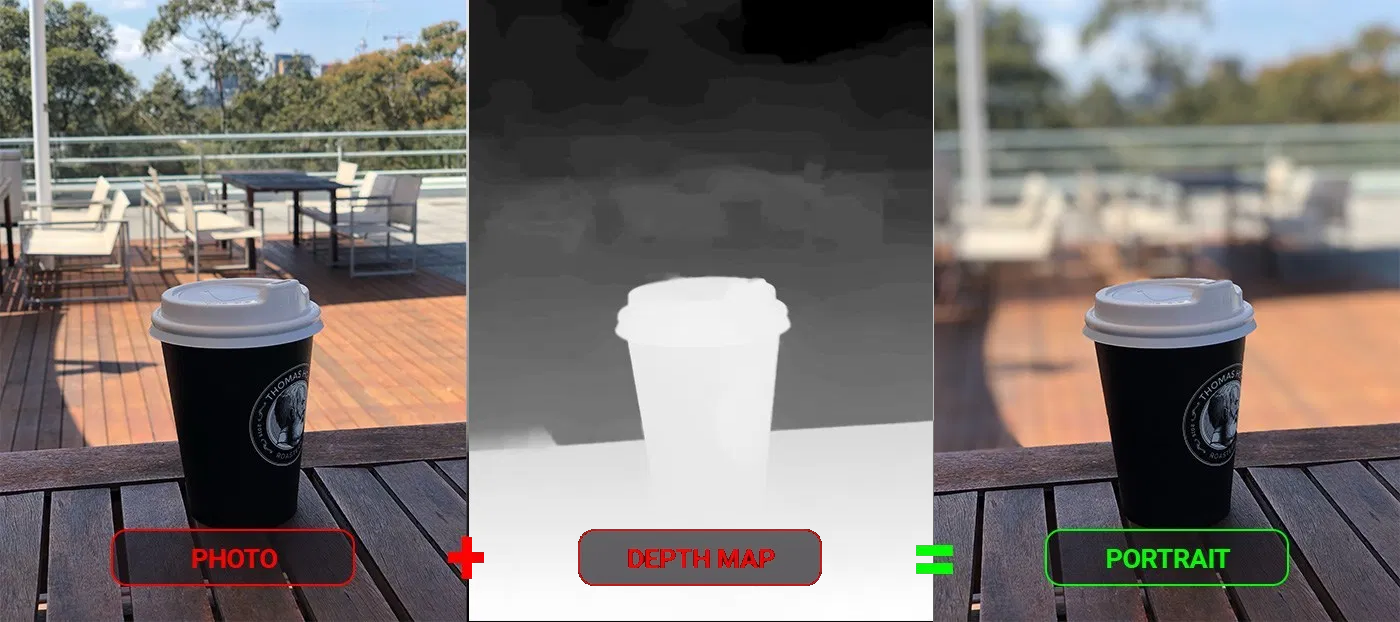
Photo + Depth Map = Portrait Mode (Marc Keegan)
~
Winging back to Facebook: if you upload a file named photo.jpg along with a file photo_depth.jpg, Facebook will treat the latter as the depth map for the photo.jpg, and create a post with a 3D photo from them.
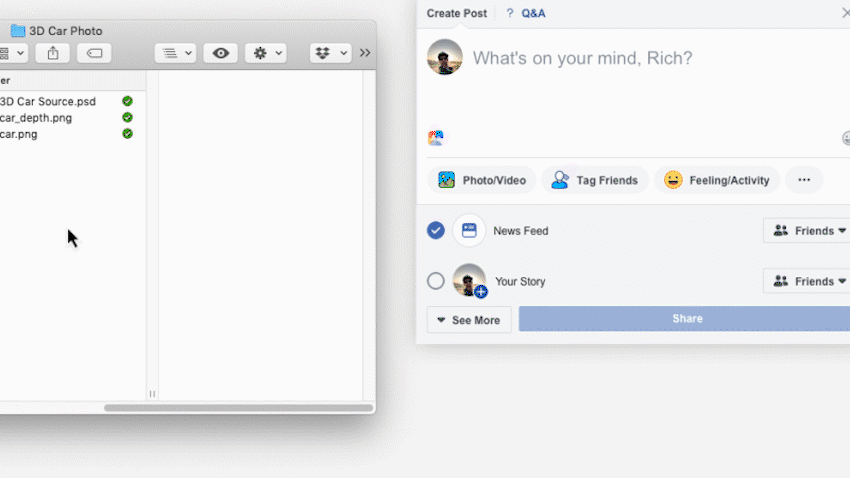
Uploading a photo and its depth map to become one one 3D photo
~
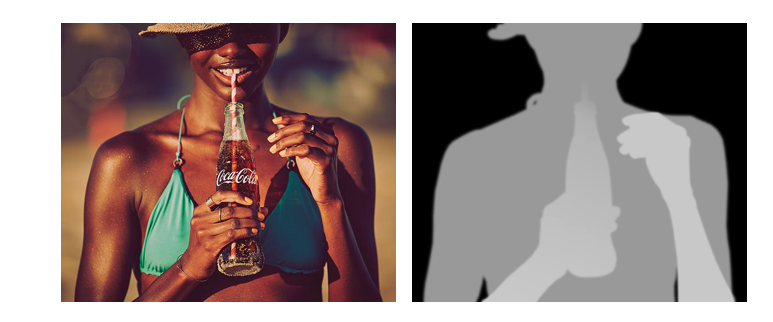
If you don’t have a depth map of a photo, you can always create one yourself manually using Photoshop or any other image editing tool.
Certain advertises have used this technique a few times by now, as illustrated on Omnivirt:

Tools like the online 3D Photo Creator have a depth prediction algorithm built in. The result is most likely not as good as your own DIY depth map, yet it give you a head start.
🤖 Psst, As a bonus you can check the console to see the link to the resulting .glb float by in said tool 😉
~
To go the other way around – from 3d photo to photo and depth map – you can use a tool such as the Facebook 3D Photo Depth Analyzer to extract both the photo and the depth map from a 3D photo post.

Just enter the Facebook post ID and hit analyze 🙂
~
Another approach to show a 3D photo is to use WebGL. With this technique you don’t need to generate a .glb, but can directly use a photo and its accompanying depth map:
(Forked from this instructional video by k3dev)
Thank me with a coffee.
I don\'t do this for profit but a small one-time donation would surely put a smile on my face. Thanks!
To stay in the loop you can follow @bramus or follow @bramusblog on Twitter.
I saw this first on https://tympanus.net/Tutorials/Fake3DEffect/ and liked it so much that we put together some examples and showed it to one of our clients.
They jumped on the idea and it now forms the main hero image on their homepage 🙂